Google Places API key
Create a Google Cloud project, enable Places API (New), generate an API key, and lock it to your domain.
The plugin needs a Google Places API key to suggest addresses. Google bills you directly, there’s no default key, no proxy, no markup. You set up your own key, and you pay Google for what you use. Most single SA stores stay inside the free monthly credit Google gives you.
This guide takes about 10 minutes. You’ll need a Google account and a card on file for billing.
What you’ll end up with
- A Google Cloud project named after your shop
- Two Google services enabled on that project: Places API (New) and Maps JavaScript API
- An API key restricted so only your own website can use it
- Billing set up on the project (required, Google won’t return results without it, even if you stay under the free credit)
Step 1, Sign in to Google Cloud Console
Open console.cloud.google.com in your browser. Sign in with your Google account.
If this is your first time using Google Cloud, accept the terms when prompted. You may be asked for a country and phone number, fill those in.
Step 2, Create a project and enable billing
Click the project dropdown at the top-left of the page and choose New Project. Give it a name you’ll recognise, your shop name works well, and click Create. Switch into the new project when Google finishes.
From the left menu, click Billing and link a billing account to your new project. If you don’t have a billing account yet, Google walks you through creating one: add your card, verify it, done. Google has a step-by-step guide for this part if you get stuck: Get started with Google Cloud billing.
Google gives every new account a monthly free credit (currently around $200 / R3,700 in Maps Platform usage). Most single-store checkouts use a tiny fraction of this. You won’t be charged unless your traffic is very high, but Google still needs a card on file before they’ll serve results.
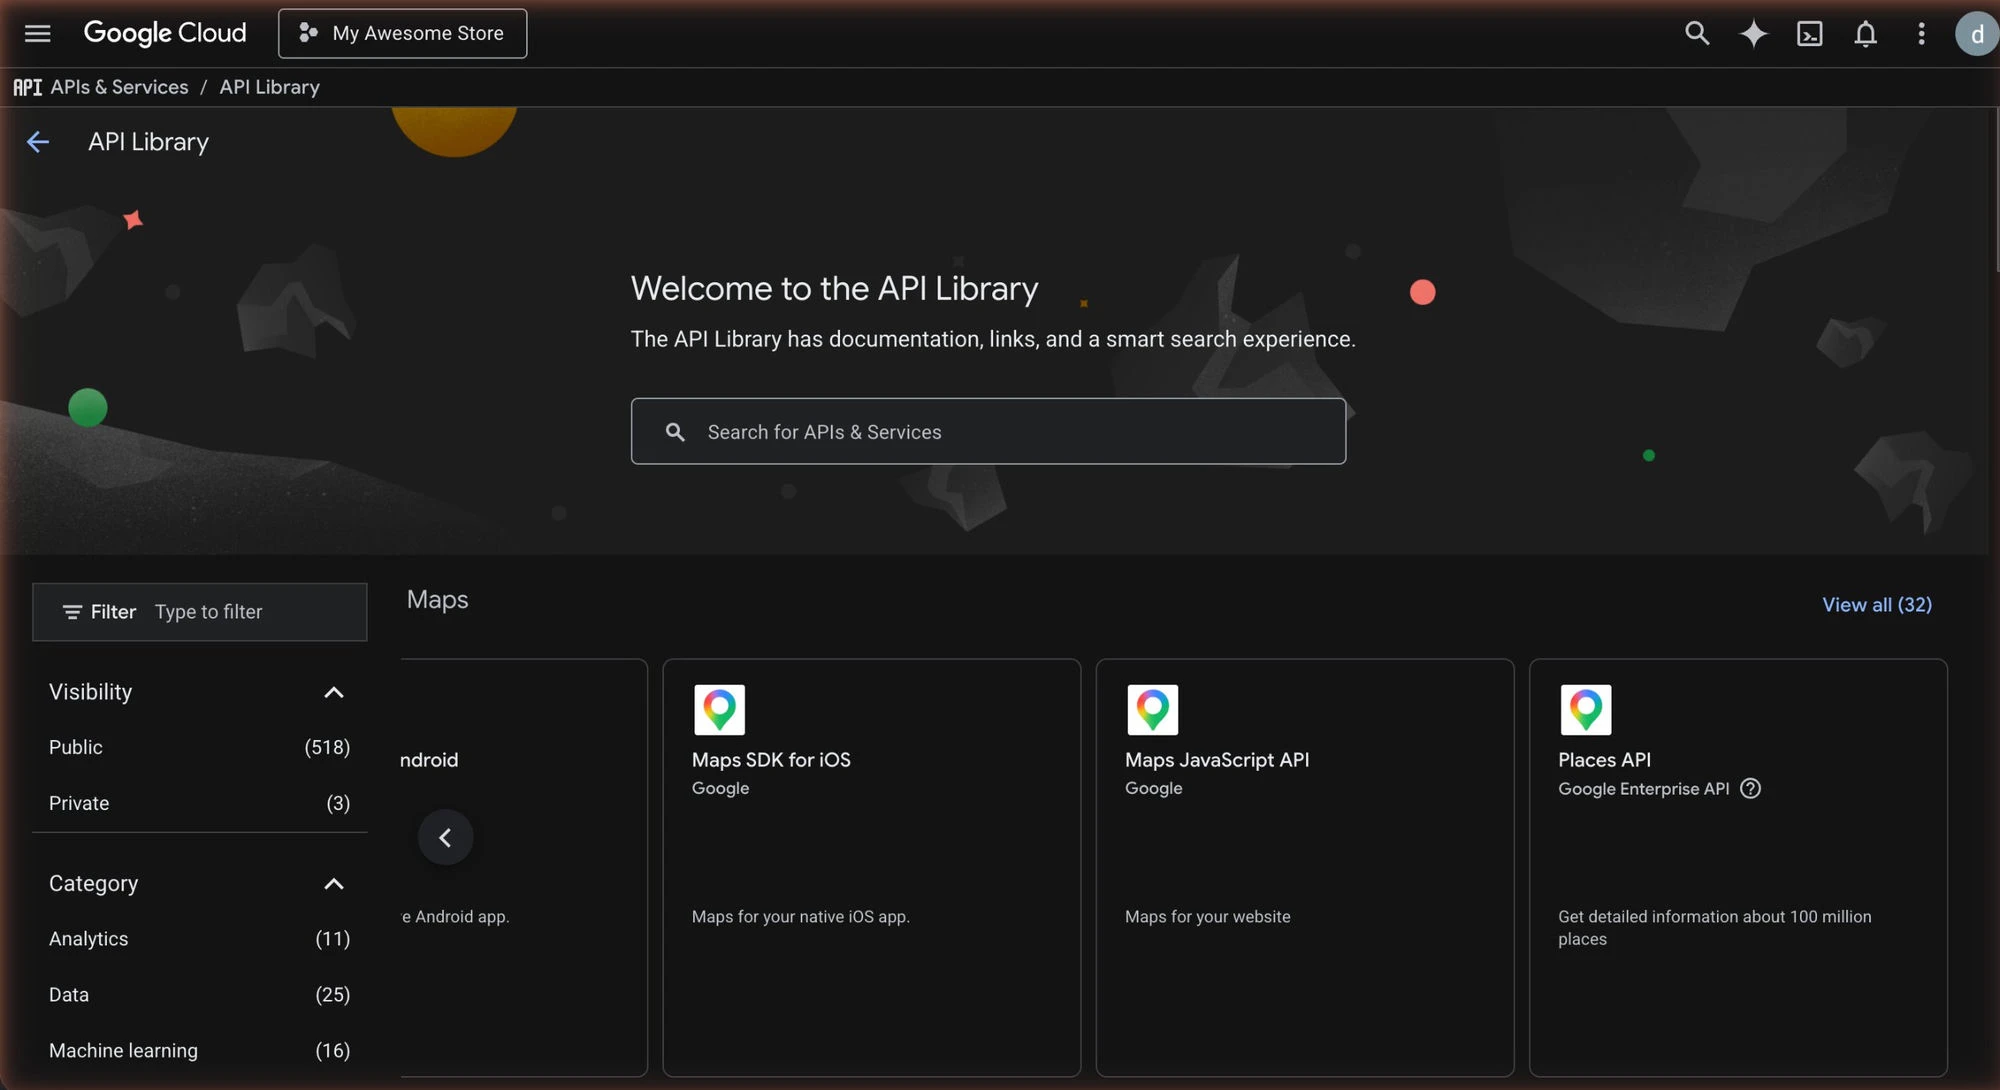
Step 3, Enable Places API (New)
From the left menu, click APIs & Services → Library. In the search bar, type Places API (New), click the result, and click Enable on the product page.
Important: the plugin needs Places API (New), not the older “Places API” service, which Google has renamed to legacy. If you enable the wrong one, the Test API Key button on your settings page will flag it and autocomplete won’t work on your checkout.
Step 4, Enable Maps JavaScript API
Go back to APIs & Services → Library. Search for Maps JavaScript API and enable it too. The plugin uses this to load the autocomplete widget into your checkout page.
Step 5, Create the API key
From the left menu, click APIs & Services → Credentials, then Create Credentials at the top, and pick API key.
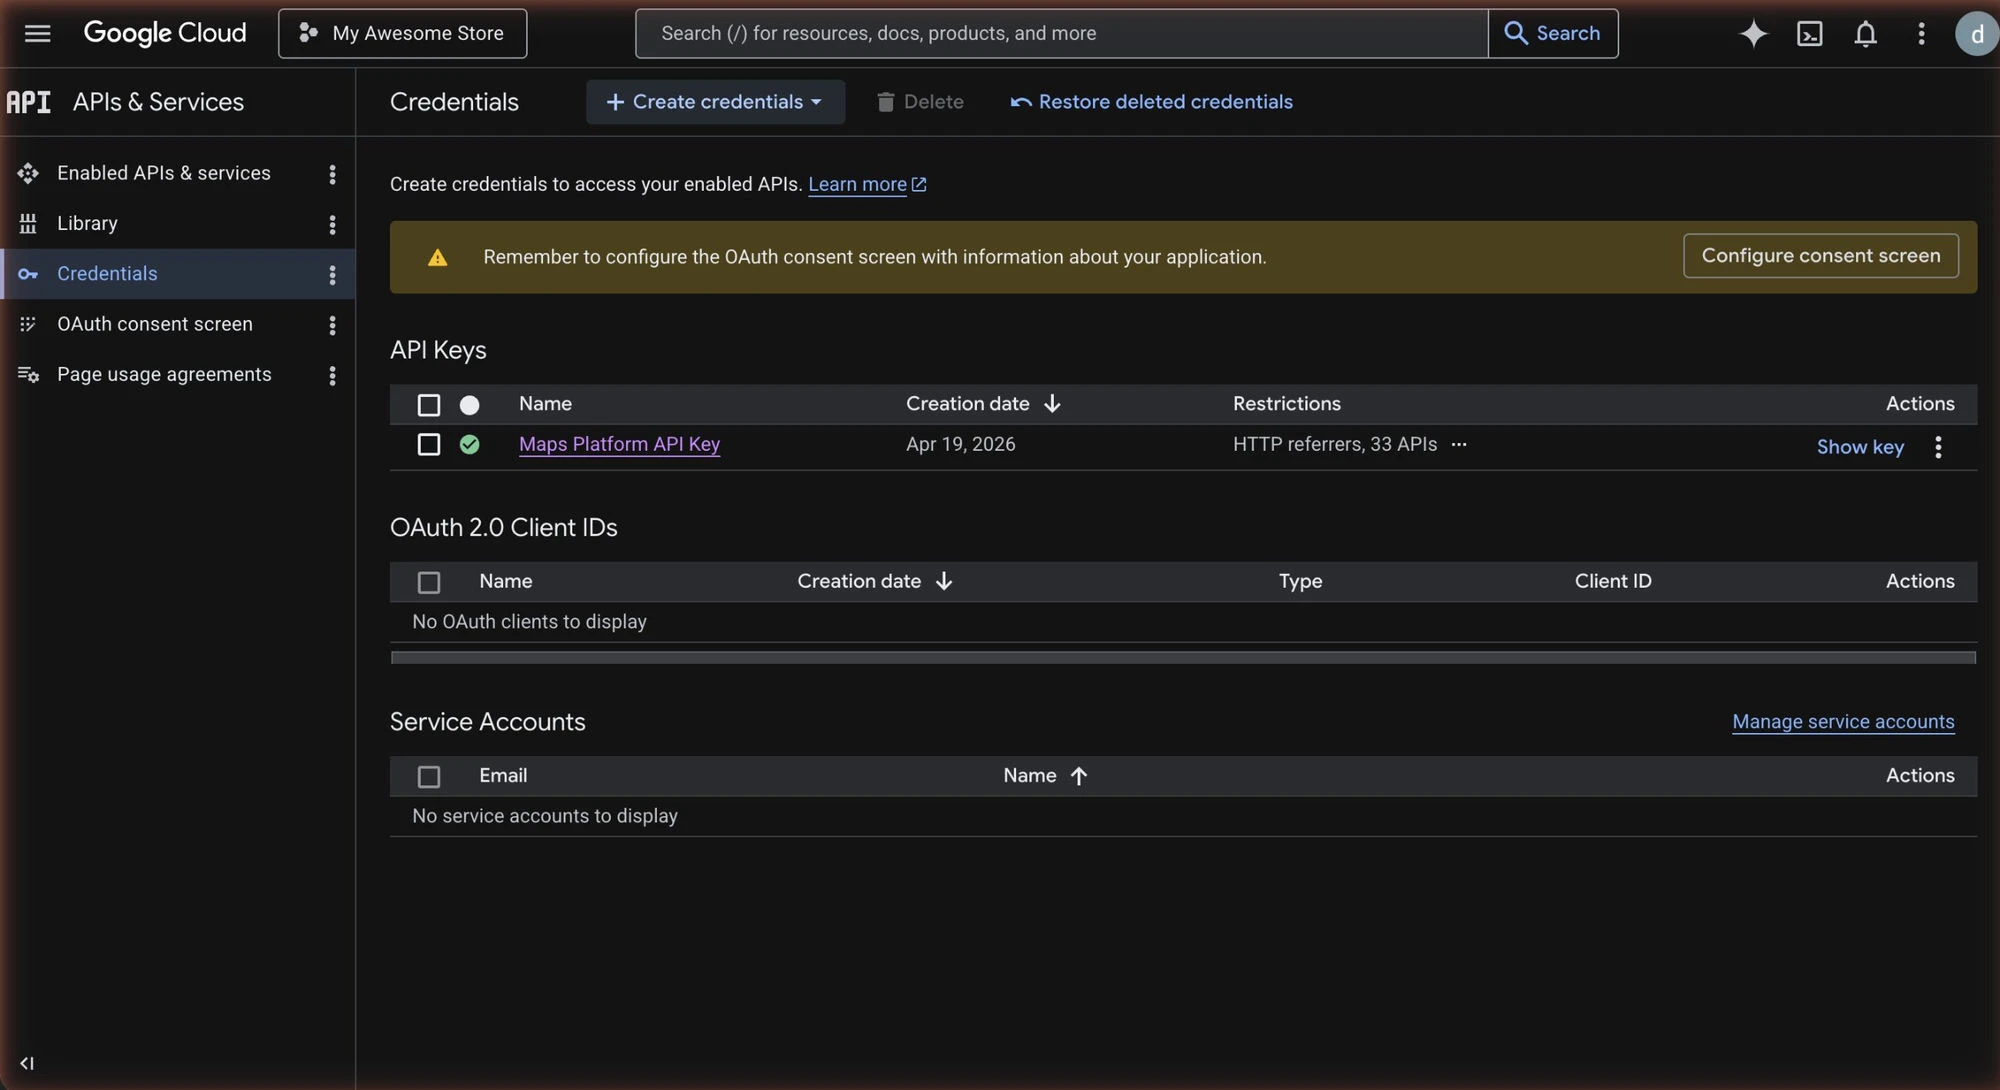
Google generates a long string that starts with AIza. Copy it somewhere safe for a minute, you’ll paste it into your WordPress settings later.
Don’t close this window yet. You still need to restrict the key.
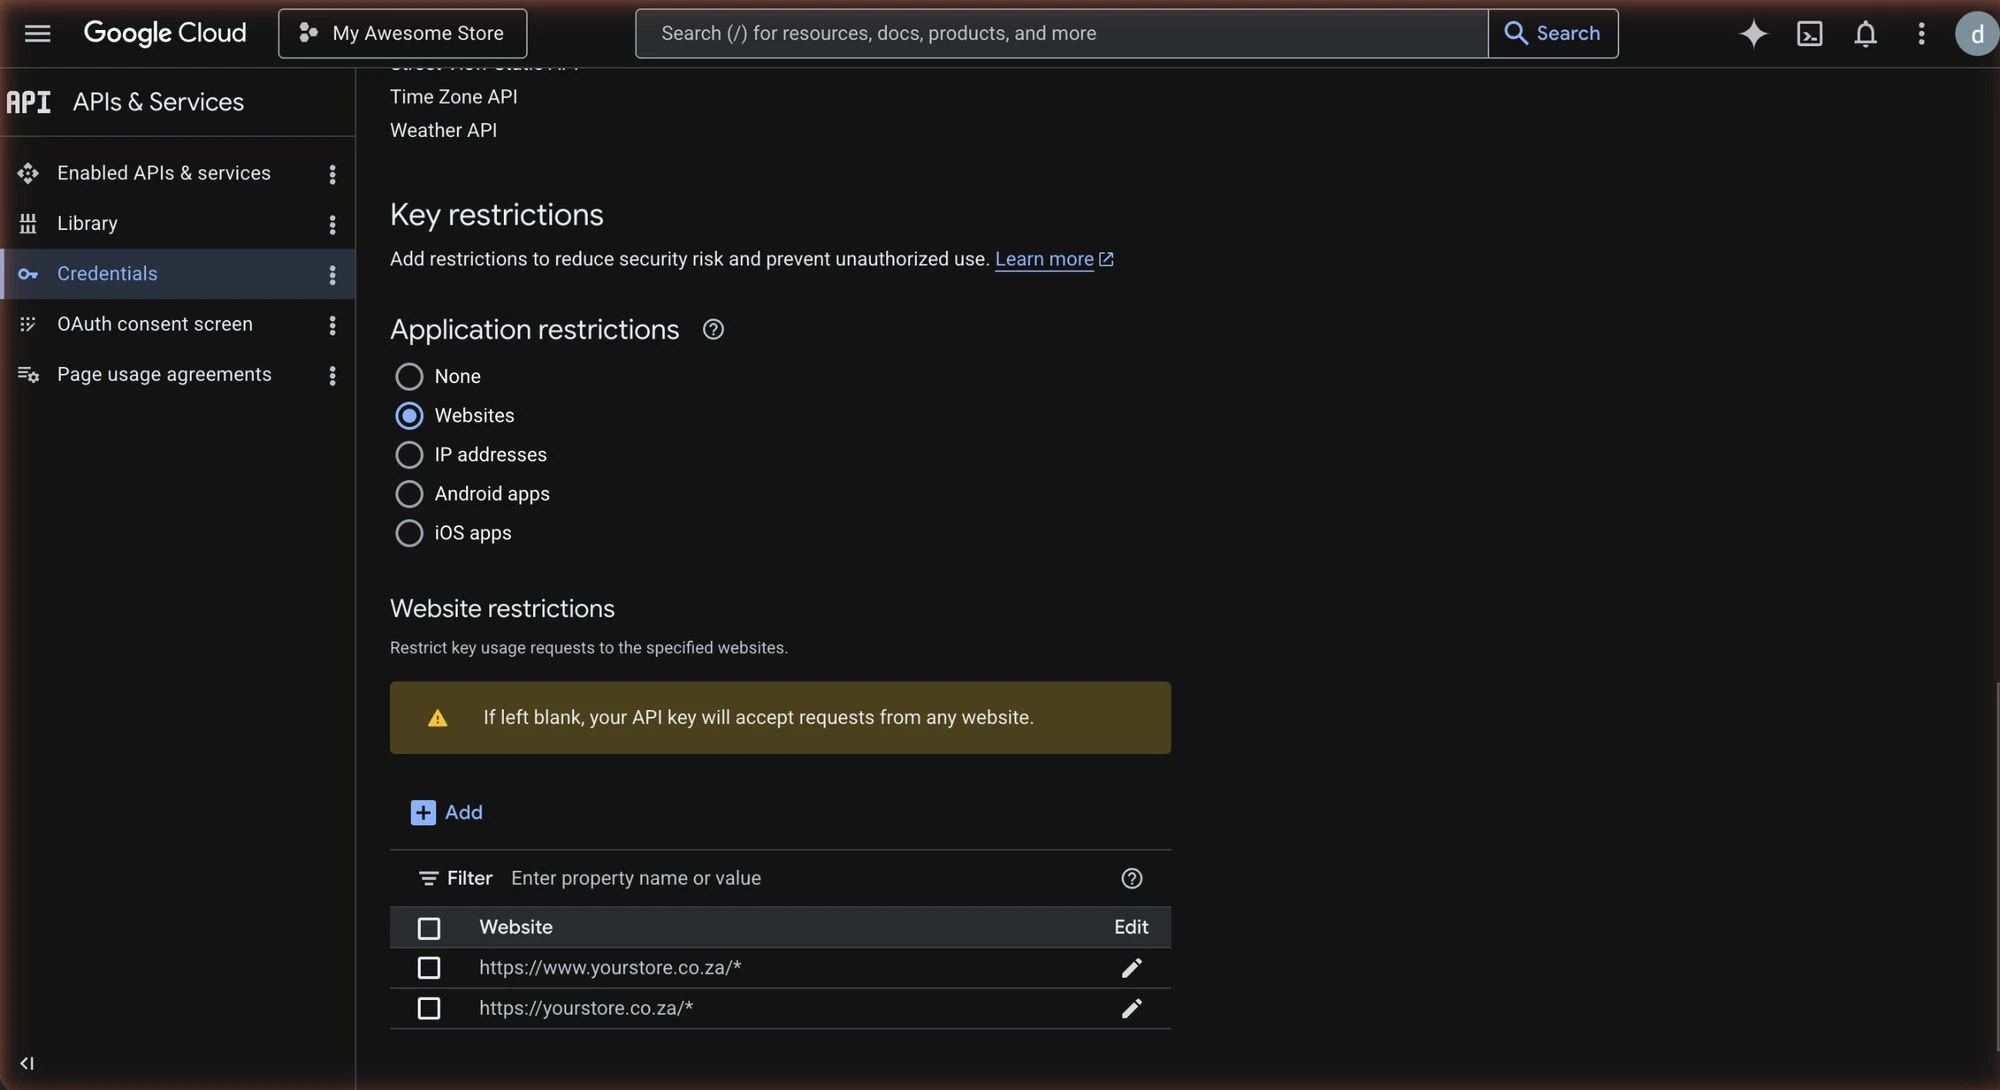
Step 6, Restrict the key to your website
An unrestricted API key is a risk, anyone who finds it in your website’s source can use it and rack up charges on your account. Always restrict.
Click the pencil icon next to your new key to edit it.
Under Application restrictions, pick HTTP referrers (websites).
Under Website restrictions, click Add an item and add your shop’s domain with a wildcard. For example:
https://yourshop.co.za/*
https://www.yourshop.co.za/*
Add the www and non-www versions as separate entries. Add your staging domain too if you have one.
Under API restrictions, pick Restrict key and tick both:
- Places API (New)
- Maps JavaScript API
Click Save.
Step 7, Wait a minute, then test
Restrictions take up to a minute to take effect. Grab a cup of coffee.
Then go to your WordPress admin → Settings → SA Address Autocomplete for WooCommerce, paste the key into the Google Places API Key field, click Save Changes, and click Test API Key.
A green tick means you’re done. A red cross means something didn’t stick, check the Troubleshooting guide for the common causes.
What about cost?
Google charges per autocomplete “session”, a customer typing, seeing suggestions, and selecting one counts as one session. Billing is per 1,000 sessions, and Google’s monthly free credit covers roughly 28,000 sessions for most accounts.
A single shop processing 500 orders a month typically uses fewer than 1,000 autocomplete sessions (most customers type one address then checkout). You’d have to be running a very busy store to exceed the free credit.
You can set hard daily limits on your key in Google Cloud Console under APIs & Services → Quotas if you want absolute peace of mind.