Getting started
Install the plugin, enter your license, add your Google API key, and test your first checkout, start to finish.
This guide walks you through a fresh install, start to finish. Follow it in order. If you get stuck on the Google API key step, the Google Places API Key guide covers that part in detail.
You will need:
- A WordPress site (version 6.5 or later) with WooCommerce (version 8.0 or later) already installed and active
- The plugin ZIP you downloaded from your KasiCode account
- Your KasiCode license email and license key (both were sent to you after purchase)
- A Google Cloud account with billing set up (a card on file, Google gives you a free monthly credit that covers most stores)
Give yourself about 15 minutes the first time.
Step 1, Upload and activate the plugin
Log in to your WordPress admin as an administrator. From the left menu, go to Plugins → Add New → Upload Plugin. Click Choose File, pick the plugin ZIP you downloaded from KasiCode, then click Install Now. When WordPress finishes, click Activate Plugin.
You should now see “SA Address Autocomplete for WooCommerce” in your Plugins list.
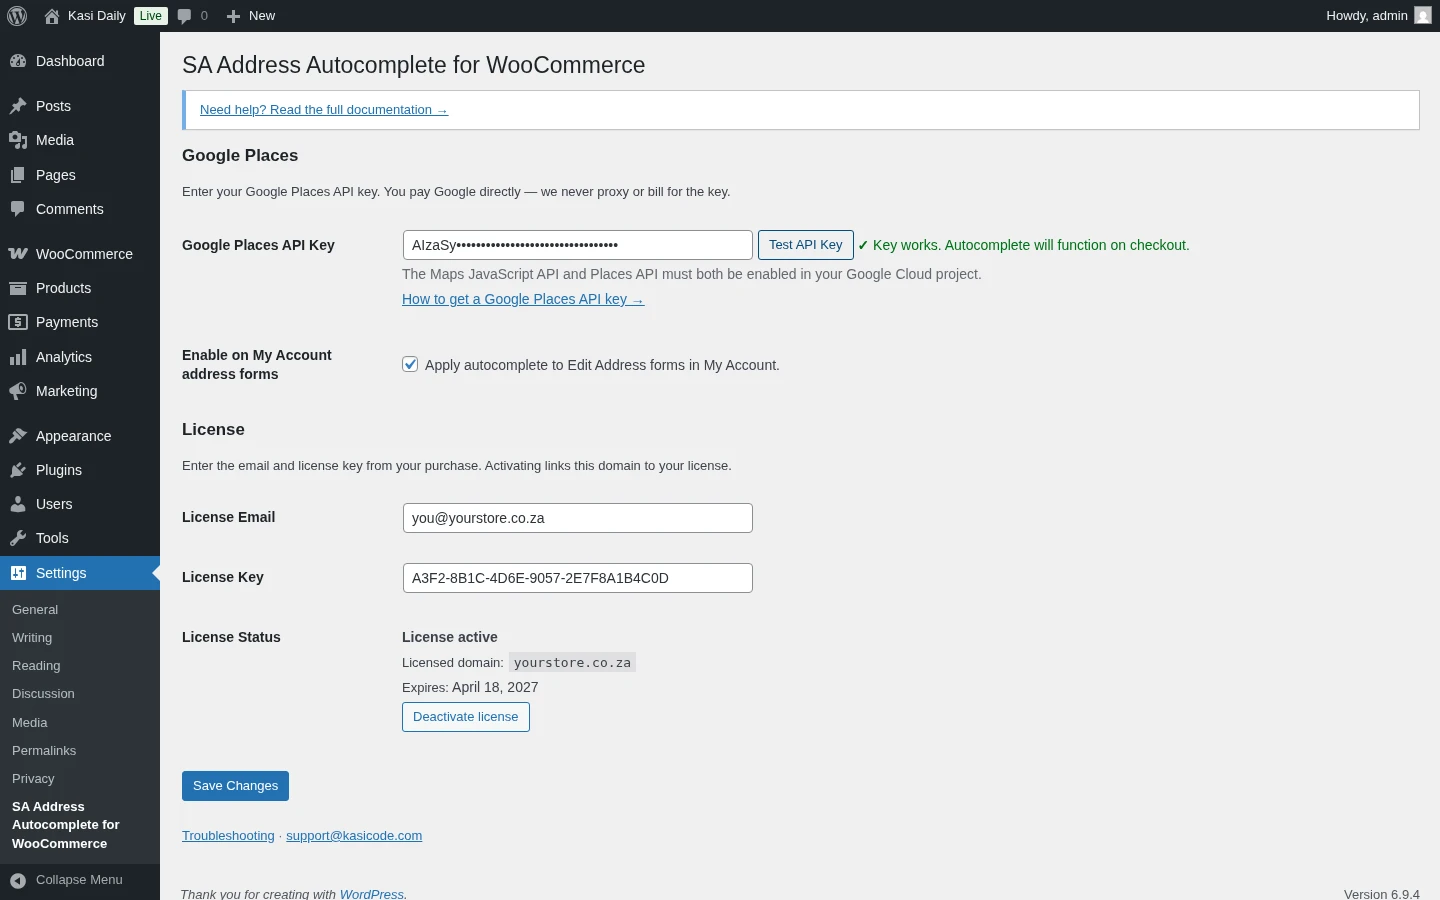
Step 2, Open the settings page
Go to Settings → SA Address Autocomplete for WooCommerce. This is where everything happens. There are no hidden menus, one page, three sections:
- License, where you enter the email and license key from KasiCode
- Google Places API Key, where you paste the key from your Google Cloud account
- Options, one checkbox for the My Account autocomplete
Step 3, Activate your license
In the License section, enter:
- The email address you used when you bought the plugin on kasicode.com
- Your license key (it looks like
KC-XXXX-XXXX-XXXX-XXXX)
Click Activate. You should see a green “Active” label appear within a second or two. Your license is now bound to this site. If you bought the Personal tier you can activate one site. Business covers five, Agency covers twenty-five. If you try to activate more than your tier allows, the activation is rejected and you’ll see a message telling you so.
Step 4, Get your Google Places API key
The plugin uses Google’s Places service to suggest addresses. Google bills you directly, there’s no markup, and there’s no default key bundled with the plugin.
Most single stores never exceed Google’s free monthly credit. But you do need to create the key and turn billing on.
Follow the Google Places API Key guide to create the key. Come back here when you have it.
Step 5, Enter the Google API key
Back on the settings page, paste your key into the Google Places API Key field. Click Save Changes.
Step 6, Test the key
Click the Test API Key button right below the key field. This makes one small request to Google to confirm your key works.
You’ll see one of three results:
- Green tick, your key is working and the Places API (New) is enabled. You’re done with this step.
- Red cross with “Places API (New) required”, your key works but the wrong Google service is enabled. Go back to the Google Places API Key guide and enable Places API (New).
- Red cross with another message, either the key is wrong, billing isn’t enabled on your Google project, or the key is restricted to a different domain. Double-check each of those.
Step 7, Test your checkout
Open your shop in another tab. Add any product to the cart and go to the checkout.
Start typing an address in the Street address field. You should see a dropdown of suggestions from Google. Pick one, the rest of the fields fill in automatically.
That’s it. Place a test order with your own details if you want a full end-to-end check. Once you’re happy, you can remove the test order from WooCommerce → Orders.
What’s next
Read the feature guides so you know exactly where the plugin does and doesn’t operate:
If something doesn’t work, the Troubleshooting guide has the common fixes.